Proportioner Warm-up
It's always a good idea to "warm up" or acquaint yourself with a new software tool before using it with an activity. If you feel comfortable exploring the buttons and features on your own, feel free to do that. If you prefer a more structured exploration, try the activities below.
Now, open the Proportioner and do the activities below.
Note The Proportioner opens in a new browser window. As you explore the software, keep this window open for reference.
The Proportioner allows you to manipulate images and compare their dimensions to the dimensions of other images. You can specify image dimensions graphically, numerically, or using a scale factor, and then use one image to "paint" another.
Warm-Up A: Getting Started
Let's take a look at the different areas of the software.
- Note the two grid areas, labeled Work Area and Paint Area.
- Familiarize yourself with the buttons on the left side and below the grid areas. What guesses can you make about what they do, and where they do it?
- Take a look at the images in the Image Gallery at the top of the window. You'll be working with these images in the Work and Paint areas.
Warm-Up B: Using the Work Area
To begin comparing images, you'll need to first choose an image from the Image Gallery at the top and drag it into the Work Area.
Setting Up the Work Area
- Drag the "Box" image from the Image Gallery into the Work Area.
- Click the Measure button to view the box's linear dimensions. The measurements remain visible until you click the highlighted Measure button again.
- Try dragging the box to a different location within the Work Area.
Resizing an Object
- Click the Resize button.
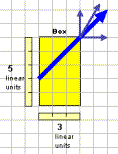
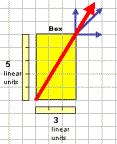
- The Resize button provides three ways to resize an object: Resize Graphically (drag the dimensions of the object), Resize to Specific Values (set exact unit values), or Resize by a Factor (multiply by a specific scale factor). Try all three methods.
- When resizing graphically, notice that you can choose different arrows. What is the difference between using the arrow that turns red when you mouse over it and using any of the other arrows?


Note To hide the arrows, click and unhighlight the Resize button.
- Now set the box size to a width of 4 and a height of 6. Which resizing method works best for setting a specific object size?
- If you have not done so already, measure the area of the box.
Duplicating the Object
- Click the Duplicate button.
- Rename the second box by clicking the Rename button and entering the New Name "Box2."
- Click Apply to see the name change in the Work Area without closing the dialog box; click OK to close the box.
- Measure Box2.
- Using any resize method, set the size of Box2 to a width of 6 and a height of 8.
Comparing Objects
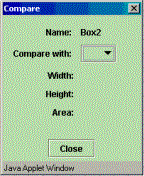
- Make sure Box2 is selected and click Compare.

- Use the pull-down menu to select Box1 as the image to Compare with.
- Note the three types of comparisons: Width, Height, and Area.
- Close the Compare box.
Warm-Up C: Using the Paint Area
In this warm-up, you're going to set up the Paint Area for a different approach to comparing two images. Using one image as the unit of measure, you'll determine how much paint is required to cover the other image.
Moving one of the images
- Drag Box1 from the Work Area to the Paint Area.
- Box1 is now visible in the Work Area and the Paint Area.
Moving the other image
- Drag Box2 from the Work Area to the Paint Area.
- How does the grid of the Paint Area compare to the grid of the Work Area?
Preparing to paint
- Click Box2 in the Paint Area and note what changes in the Paint Area immediately after you click. These changes (the paint can, the picture frame, the grid shape and size, and the colors of the two images) all reflect that Box2 is the unit of measure in the Paint Area and that you could now use the paint can under Box2 to paint Box1.
- For the purposes of this warm-up, however, let's change our mind. We want to use Box1 to paint Box2. So, click the Unpaint button and note how the Paint Area reverts to its default condition.
- Now click Box1. Notice how the changes to the user interface now reflect your choice of Box1 as your "painter."
- Look at the numbers under the Box1 Paint Can and under the Box2 Frame. What do you think the numbers might represent?
Warm-Up D: Comparing Area Dimensions
Now you're ready to use the Paint Area to compare images. In this example, you've selected Box1 as the unit of measure. The bucket of paint under Box1 represents the amount of paint required to completely cover Box1. You are going to compare the area of the two images by counting the number of buckets of paint it takes to paint Box2.
- Drag the Paint Bucket from under Box1 to Box2.
- What happened to the second box?
- Look at the number under the frame icon. Did it change to reflect one bucket of paint? Look at the number under the paint can. Did it change?
Note Once the Paint Bucket under the "painter" object (in this example, Box1) is empty, it automatically refills so you can dump another bucket of paint into the other image.
- In the Work Area, change the height of Box2 to 10.
- What happened in the Paint Area? Did the image change size? Did the numbers under the Paint Can or Picture Frame change?
- In the Paint Area, drag the Paint Bucket from Box1 to Box2 again.
- How did the number change under Box2 Picture Frame?
- How many Paint Buckets does it take to fill up Box2?
- What happens when Box2 is completely full?
- What does a non-integer number means under each box?
- Now, in the Work Area, use Resize Graphically to make the area of Box2 smaller than the area of Box1.
- What happened to the numbers in the Paint Area under the Paint Can or Picture Frame as you resized Box2? What do the changes now reflect.


